Tuesday, July 17, 2012

White Bean Stew with Swiss Chard and Tomatoes

Well, after I said I wouldn't post, I typed this recipe up to email to my cousin and I figured that I should just post it because it's SO GOOD.  If you're looking for a low-calorie, VERY fresh tasting meal, this is just right!  It got an A+ from myself and my husband. 


2 lbs Swiss chard, large stems discarded and leaves cut crosswise into 2-inch strips
¼ C extra-virgin olive oil
3 cloves garlic, thinly sliced
¼ tsp. crushed red pepper
1 (26 oz) can diced tomatoes
1 (15 oz) can cannellini beans, drained and rinsed
½ tsp salt
¼ tsp pepper

Add chard to a large pot of boiling water and simmer over moderate heat until tender, 8 minutes.  Cool slightly, then drain, squeezing out excess liquid.

In the same saucepan, heat oil over medium-low heat, and cook garlic and crushed red pepper until garlic is golden, 1 minute.

Add tomatoes and bring to a boil.  (I didn’t drain them because the recipe didn’t say to.)  Add beans and simmer over moderately high heat for 3 minutes.

Add the chard and simmer over moderate heat until the flavors meld, 3 to 4 minutes.  Season with salt and pepper and serve.

Yeild: 4 servings

I found this recipe in People Magazine and I'm so glad I tried it.  Here's a little picture montage of when I made it for the first time:

Ready to begin...

 (Yes, I used navy beans the first time I made it just because that's what I happened to have on hand.)

Boiling the chard...


Looking tasty!!


The finished product...


And, it's a hit!  :)

ENJOY!!  :)

Monday, July 16, 2012

A Little Lull

So...yea.  I said I would post soon and that was practically a month ago!!  I've been in "purge" mode with my house and in many ways, my life, lately (post to come on the other blog about that), so it's only fair that I be honest about this blog.  It was a passion of mine and cooking is STILL a passion of mine.  However, I just don't have the time to commit to it right now.  I look back at recipes on here all the time, so I'm going to keep it up for as long as I can (why not take up a little bit of cyber space??) and I might post here in the future.  I just wanted to let you know so you don't feel the need to take any of your precious time checking for new recipes from me.  :)  

Thanks for reading and ENJOY your life daily.  :)

Monday, June 18, 2012

Where Did I Go??

I've been a little too busy to post anything the past couple of weeks, as I'm sure you've noticed.  I do, however, have a HUGE stack of recipes sitting next to my computer and they are all ones that I've tried.  SO, once I get a chance, I'll sit here and post post post so you can see what we've been eating for the past couple weeks.  Let me say that we've tried some REALLY yummy things and my kids have even been going ga-ga for some of these dishes so stay tuned!!  :)

Thursday, May 31, 2012

Chicken Lettuce Wraps

I love love love the chicken lettuce wraps from P.F. Chang's restaurant, so I was thrilled to come across this recipe in my "stack o' recipes".  I found it in Taste of Home magazine a couple years ago and it turns out to be a Katie Lee recipe.  I figure that I like her meatloaf so much, I'd probably like her lettuce wraps, too!  First off, you have to know that she calls these "lettuce cups" and uses a narrow lettuce (like romaine or butter lettuce) for the "cups".  I wanted "wraps" (and I was also in a hurry at the grocery store), so I just purchased a head of iceberg lettuce and carefully pulled the layers apart.  I also thought this would be good as a salad, so I chopped up some iceberg, too, and that's how I ended up eating mine.  It was super good and got an "A" from my hubby, too!  Okay, onto the recipe...

Prep Time: 25 minutes
Cook Time: 20 minutes
Yield 6-8 servings (as lettuce cups) --- this pretty much fed my husband and myself as a regular meal.

1 packet stir-fry seasoning powder
1/4 cup water
2 T. soy sauce
2 T. lime juice
1 tsp. sugar
1 T. canola oil
1 lb. ground chicken
1 red bell pepper, diced
1/4 cup water chestnuts, diced
2 T. scallions, thinly sliced
Pinch of red pepper flakes
1 head of romaine or butter lettuce (inside leaves only) for the cups (or, as I was mentioning before, this is quite a versatile dish so do what you want with it)
For garnish: mint, cilantro, bean sprouts, chopped peanuts


In a small bowl, combine the stir-fry seasoning, water, soy sauce, lime juice and sugar.  Set aside.


Heat oil in skillet over medium heat.  Add chicken meat and cook until browned (breaking the meat up as you cook it), about 10 minutes.  Add red pepper, water chestnuts, scallions and red pepper flakes and cook 5  minutes more.  Stir in stir-fry seasoning mixture, and cook until liquid evaporates (about 2-3 minutes).


Serve in lettuce cups garnished with mint, cilantro, bean sprouts and peanuts.


I would have liked to find bean sprouts for this but as I mentioned before, I was very hurried at the store, so I only bought cilantro.  This also used up a package of ground chicken from my freezer which was awesome.  I had never bought a packet of stir-fry seasoning before and ended up finding it by the ethnic foods section of my grocery store, so keep that in mind as you're looking for it. 

Here's how my "salad"/lettuce wraps turned out and it was SO delicious. 


Can't wait to try this again and it makes a great summer-time dinner.  Enjoy!

Wednesday, May 30, 2012

Risotto with Chicken & Asparagus

Awhile back, I was looking for some great "put-together-and-freeze" meals---much like they make at Let's Dish.  My idea was to have a bunch of mommy friends over and we'd all put together meals for our families.  I ended up finding this blog that is written by a mom with the same ideas as myself.  I ended up printing a few recipes from her site but this is the first that I've tried.  I decided to post this to my blog, too, because I did this a little differently---I didn't freeze it ahead of time.  I just made it fresh.  Okay, here's the recipe that I used: 

(If you want the freezer version, please check out the other blog.)


3 cups cooked chicken breast, cubed
1 cup instant rice (uncooked)
3 T. chicken base (found by the broths in your local store)
2 tsp. minced garlic
1/4 black pepper
2 tsp. olive oil
1 cup fresh asparagus, chopped into 1/2 inch pieces
1 cup red bell pepper, chopped
1/2 cup shredded Parmesan cheese
1 cup bacon, cooked and crumbled
4 ounces cream cheese


Combine chicken, rice, chicken base, garlic, pepper and olive oil in large skillet.  Add two cups of water to the skillet, cook on low-to-medium heat for about 20 minutes, or until the rice is cooked.  Stir cream cheese, asparagus, red bell pepper and Parmesan into the rice mixture.  Cook for 5 minutes, or until the cream cheese is melted and the vegetables are crisp tender.  Sprinkle with bacon before serving.


Trying to stick with my resolution of using things I already had in my cupboard, I used frozen asparagus that I already had and the only things I had to buy were red pepper and chicken base (which I have never used before).  I feel like I used a million pans while making this dish, just because I had to cook the bacon beforehand (I was out of the fully-cooked kind that I normally like to use for things like this) and I cooked the chicken in the crock pot during the day to save time.  When everything was cooking, it smelled SO AMAZING.  I couldn't resist taking a little taste test before I put the veggies in the skillet and everything tasted so good.  HOWEVER, the end product was very salty to me.  I have never had a Let's Dish meal before, so I'm not sure if they lean on the salty side of the pallet but this specific dish was quite salty.  So, I suggest cutting the chicken base and the Parmesan by a third, therefore using only 2 T. of chicken base and 1/2 cup of Parmesan.  I hope this makes it less salty so the flavor of the dish stands out  more.  All in all, I'd like to make this again because it has everything in it that I love.  Enjoy!!

Wednesday, May 23, 2012

Turkey Burger

One of my guilty pleasures is reading a weekly tabloid magazine and I often rip out recipes that the magazine features.  This time, I found a turkey burger recipe by chef Reed Alexander and I just so happened to have a pound of ground turkey waiting to be cooked.  I was also quite interested to try this recipe because it calls for the use of a food-processor, which I do not have.  I do, however, have a really big (and very intimidating) new blender that can apparently chop and blend anything, so I decided to give it a go!


Here's the recipe:

1 portobello mushroom cap, stem and gills removed, chopped
3 T. chopped parsley
2 T. chopped carrot
1 T. chopped onion
1 lb. lean ground turkey
2 egg whites
1 tsp. Worcestershire sauce
1/4 tsp. sea salt
1 tsp. pepper
canola oil spray
4 buns (recipe makes four burgers)

(The picture in the magazine also showed the burger with tomato and avacado on it, plus I put some mayo on mine, and it also said that cheese would be tasty on the burger---maybe Swiss or American.)

- Pulse the first four ingredients in food processor for one minute or until well-combined.
- In a bowl, mix the turkey, egg whites, Worcestershire sauce, salt, pepper and vegetable mixture.  Divide into four patties and refrigerate for 15 minutes.
- Preheat grill to medium heat.  Spray with canola oil.  Grill patties 4-5 minutes.  Rotate quarter turn and grill an additional 4-5 minutes.  Flip burgers and grill 5-7 minutes more.  Place on buns and serve with desired toppings.

So....let's talk about this ground turkey, shall we?  I normally would buy the Jennie-O brand from my local grocery store, but I happened to buy a pound from Trader Joe's for the first time.  When I combined all the ingredients with the turkey in a bowl, the whole concoction was pure mush.  Like "won't even stay together in a patty" mush.  I definitely refrigerated it because I thought that would keep it together more (which I think helped a little bit) but I was worried that it was even too mushy to grill.  So, I told my husband that he had the night off from grilling and ended up cooking these on the stove in a big skillet.  I'm glad I did because they ended up firming up as they cooked at it all turned out okay.  I would try a different brand of turkey next time and see if that is better because I'm sure they taste really great when they are cooked on the grill.  That said, on the stove, they were delicious as well!  My 6-year old just recently decided that he likes regular hamburgers so I kind of tricked him by not tell him that he was about to eat a turkey burger.  He loved it!  It was a hit with everyone and the kids had no idea they were eating so many vegetables with their burger.  My husband said that he likes these even more than traditional burgers because they have SO much flavor.  I think this is definitely going to be a summertime favorite in our house! 

Here's a bad picture of my burger before I ate it.  (The avocado was perfectly ripe but the horrible camera-phone picture created a lot of shadows on it.  Boo.)

Enjoy!!

Monday, May 21, 2012

Santa Fe Chicken Enchilada Soup

Last week, I decided that I wanted to make something with the can of black beans from my pantry so I went on allrecipes.com and found this recipe.  It was submitted by Philadelphia (the cream cheese company) and called for a container of one of their new "cooking cremes", which I have been meaning to try.  Besides the cooking creme, I already had everything in the recipe...


I also had to run out and get some cilantro, which was totally worth it.  (We love love love cilantro!)  Okay, enough chatter---here's the recipe:

4 (6 inch) corn tortillas, cut into strips
1 teaspoon oil
1 lb. boneless skinless chicken breasts, cut into bite-sized pieces
1 (10 ounce) tub of Philadelphia Santa Fe Blend Cooking Creme
1 cup milk
1 (15 ounce) can black beans, rinsed
1 (11 ounce) can corn with red and green bell peppers, drained (aka "Mexicorn")
1 (14.5 ounce) can diced tomatoes, drained
1/4 cup chopped cilantro


Directions:
- Heat oven to 400*
-Toss tortilla strips in oil; spread into a single layer on baking sheet.  Bake for 10-12 minutes or until crisp, stirring occasionally.
-Meanwhile, cook chicken in large nonstick saucepan sprayed with cooking spray on medium-high heat until chicken is done (about 8-10 minutes), stirring frequently.  Stir in cooking creme, milk, beans, corn and tomatoes.  Simmer on medium-low heat for 6-8 minutes or until heated through, stirring frequently.
-Serve soup topped with tortilla strips and cilantro.

So...of course I did a few things differently, as I usually do.  :)

First, I already had a bag of white corn tortilla chips that we are trying to eat up, so I did not make the tortilla strips like the recipe calls for.  I have, however, made them in the past and they are super easy and super delicious so I do recommend making them if you don't have tortilla chips on hand.  Secondly, I cooked the chicken in the crock pot for this one and then just transferred it over to a smaller pot on the stove when it was closer to dinner time.  A couple reasons why I did this:

1. In soups like this, I love when the chicken is more pulled/shredded than chunky.  Probably just me, so go ahead and cook it like the instructions tell you to if you want.

2. It's so easy to cook chicken in a crock pot!  I put the whole chicken breast in there with some water and chicken bullion and let it cook for about four hours on low.  By then, all I had to do was break it up a little bit and it was ready to go!  Once the chicken was transferred to the stove, it seriously took about 10 minutes to get the soup ready.  Talk about awesome!! 

Here's a little peek at the end result.  I put cheese on mine, and didn't add any chips. 


By the way, the soup wasn't spicy so even my toddler had two helpings of it.  And don't skimp on the cilantro!  It really does add a delicious flavor so it's well worth making a trip to the store if you don't already have some.  Enjoy!!

Tuesday, May 15, 2012

Best Broccoli

I found this recipe on Pintrest awhile back and ever since, I have not made broccoli any other way.  In fact, we have broccoli AT LEAST once a week now because of this delicious recipe!!

-Take 4-5 pounds of broccoli (I use two bags of the pre-cut, pre-washed) and toss in about 4-5 tablespoons of olive oil.
-Place on a foil-lined pan (I also spray the foil with cooking spray).
-Shake about 1-1/2 tsp salt, 1/2 tsp pepper and 4 minced garlic cloves over the broccoli.  (For this recipe, I actually don't use fresh garlic.  I use the dry minced garlic from the spice rack and I use about 1/2 tsp.)
-Roast the broccoli in the oven at 425* for 20-25 minutes or until the broccoli is crispy.  Some parts of the broccoli will be browned.  (I like to stir it up a bit halfway through the cooking time to get it even.)
-When you pull it out of the oven, toss the cooked broccoli with about 1-1/2 olive oil (don't saturate it!!), 1 tablespoon lemon juice and about 1/3 cup grated Parmesan cheese. 

I love love love this crispy broccoli so much that I cook mine for a little bit longer than the recipe calls for.  I also have tried asparagus like this now, too, and that was super good as well.  Enjoy!!

Monday, May 14, 2012

Crock Pot Chicken with Stuffing

I found this recipe awhile ago on allrecipes.com and just so happened to have all of the ingredients...

I took a really neat picture of the ingredients sitting next to my crock pot, but of course I can't find it now, so I apologize for the lack of picture!! 

I cannot express to you how very very easy this recipe is.  Just take a pound of chicken breasts and put them in the crock pot.  Pour a can of (condensed) cream of chicken soup over the chicken.  In a bowl, mix 1-1/4 cups water, 1/4 cup melted butter and 1 (6 ounce) package of corn bread stuffing.  Pour stuffing mixture over the chicken and the soup and cook on low for about 4 hours (or until chicken is cooked through).

Instead of corn bread stuffing, I used a box of regular Stove Top chicken flavored stuffing and it turned out wonderfully.  The chicken wasn't anything super special but the stuffing really made this great.  My kids will eat chicken without complaining so I knew that would be okay with them, and they ended up loving the stuffing so much that it was gone in a flash.  The comments on this recipe stated that sometimes the "inventor" of the recipe puts two cans of soup in.  I think I'd try that next time with double the amount of stuffing, since that was the real hit in our house.  Enjoy!!

Friday, May 11, 2012

Dutch Apple Bread


 My family loves banana bread and other sweet breads like that, so I try to make them every so often and even freeze a loaf or two.  I happened to have a lot of apples recently so I looked up a recipe for an apple bread.  I found a great recipe on Allrecipes.com (which is always a good back-up site to check out if you're looking for a recipe of pretty much anything).  I've linked the actual recipe site to the title but here's what it entails:

Dutch Apple Bread

Ingredients
  • 1/2 cup butter or margarine, softened
  • 1 cup sugar
  • 2 eggs
  • 1 teaspoon vanilla extract
  • 2 cups all-purpose flour
  • 1 teaspoon baking soda
  • 1/2 teaspoon salt
  • 1/3 cup buttermilk
  • 1 cup chopped, peeled apple
  • 1/3 cup chopped walnuts
  • TOPPING:
  • 1/3 cup all-purpose flour
  • 2 tablespoons sugar
  • 2 tablespoons brown sugar
  • 1/2 teaspoon ground cinnamon
  • 3 tablespoons butter or margarine
Directions  
In a mixing bowl, cream butter and sugar. Beat in eggs and vanilla. Combine flour, baking soda and salt; stir into the creamed mixture alternately with buttermilk. Fold in apple and nuts. Pour into a greased 9-in. x 5-in. x 3-in. loaf pan. For topping, combine the first four ingredients; cut in butter until crumbly. Sprinkle over batter. Bake at 350 degrees F for 55-60 minutes or until bread tests done. Cool in pan 10 minutes before removing to a wire rack. 
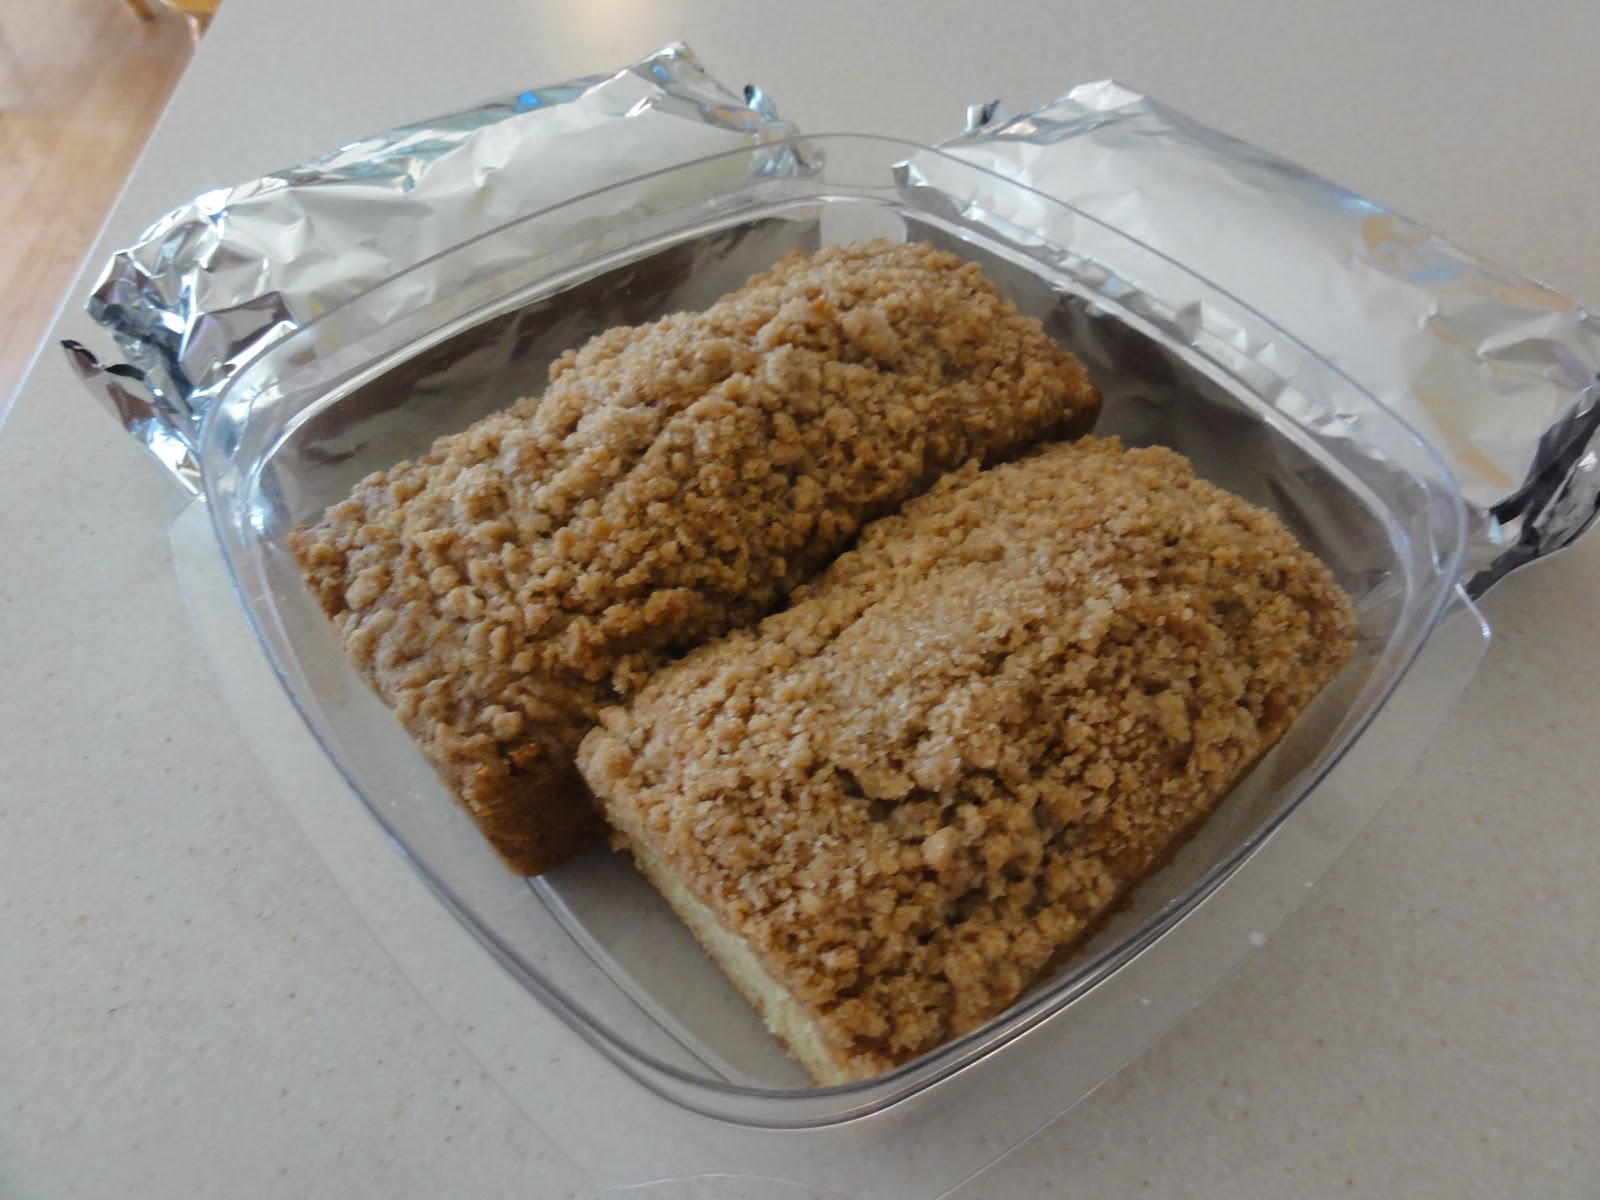
I did not put in walnuts (because sometimes I have people over with allergies) and put about 1/4 cup more apples than it called for.  I actually doubled the recipe and put it into four smaller loaf-pans (as you can see from the picture) and I only had to bake them for 45 minutes.  I also chopped up the peeled apple with the Pampered Chef chopper and it was so easy!!  The crumbly topping really made this yummy, even though the end result was more cinnamon-y than apple-y (I was told by my taste-testers).  I'll definitely be making this a few more times in the fall when we go pick apples at the apple orchard.  


Thursday, May 10, 2012

Meatballs in Red Sauce

I asked my family what they wanted for dinner tonight and they said "spaghetti".


(Sorry for the not-so-great picture and the cluttered kitchen counter.  Life was a little hectic today and my cell phone was the only camera within reach.)

I had all the fixings already (including a nice baguette to make garlic cheese bread) but I wanted to try something new rather than just browning some ground beef and mixing it with the sauce.  Then, I thought that meatballs might go over better with some members of my family, but here's the problem with that: I make a mean meatloaf but my meatballs are mediocre at best.  So, of course, I did a little bit of research online and found a great recipe from Emeril on the Food Network site.  (He also lists a recipe for making your own sauce, too, but I already had some jarred stuff that I thought I should use.)
Here's his meatball recipe:

Ingredients
  • 10 cups Simple Tomato Sauce for Pasta, recipe follows, or store-bought pasta sauce

For the meatballs:

  • 1 large egg
  • 1 pound lean ground beef
  • 1/2 cup chopped yellow onions
  • 1 1/2 teaspoons minced garlic
  • 1 tablespoon chopped fresh parsley leaves
  • 1 teaspoon freshly chopped basil leaves
  • 1 teaspoon freshly chopped oregano leaves
  • 1 teaspoon salt
  • 1/2 teaspoon ground black pepper
  • 1/2 teaspoon Emeril's Original Essence, recipe follows
  • 1/2 cup finely grated Parmigiano-Reggiano   
Directions:

Place the Basic Red Sauce in a large pot. Bring to a simmer over medium-high heat, stirring occasionally. Place all the remaining meatball ingredients in a large mixing bowl. Stir well with a wooden spoon to combine, then form the meat into balls by rolling about 2 tablespoons of meat between your hands. Place meatballs on a plate as they are formed. (Hint: if your hands are slightly damp, the meatballs will roll more easily and will not stick to your hands!) When all the meatballs are formed, gently place the balls into the sauce 1 at a time using a long handled spoon. Be careful - bubbling sauce splatters! Simmer the sauce uncovered, and allow the meatballs to sit undisturbed for 10 minutes before stirring. Stir the meatballs into the sauce when they rise to the top.
Simmer for an additional 20 minutes, stirring occasionally to prevent the sauce from sticking to the bottom of the pan.

I used regular grated Parmesan cheese, only 6 cups (or so) of sauce (that was the two jars that I had),  and 1/2 tsp. each of dried parsley, basil and oregano.  Also, I didn't have any of Emeril's Original Essence, but--luckily--he lists the recipe for that, too, on the Food Network site.  If you want to see what it's all about, here's the recipe for that:

Emeril's ESSENCE Creole Seasoning (also referred to as Bayou Blast):
  • 2 1/2 tablespoons paprika
  • 2 tablespoons salt
  • 2 tablespoons garlic powder
  • 1 tablespoon black pepper
  • 1 tablespoon onion powder
  • 1 tablespoon cayenne pepper
  • 1 tablespoon dried oregano
  • 1 tablespoon dried thyme
Combine all ingredients thoroughly.
Yield: 2/3 cup

That saved me a trip to the store because I already had all of those spices in my very full spice cupboard.

Not to make this post any longer, but I also have to say that I had to do more googling after reading this recipe because I was baffled that cooking the raw meatballs in the sauce was correct.  As it turns out, that is a very authentic Italian way to do it, and I'm sure that's why my other meatballs have never turned out.  What the heck, I thought, let's give it a go!

So...what was the verdict?  A+!!  Everyone loved it!  The meatball-making process was SO easy and they turned out just perfectly.  I'm so glad to have another Italian meal to add to my repertoire and I give a big thanks to Emeril for sharing such a tasty and simple meal.  :)

Wednesday, May 9, 2012

Raspberry Mojito

The other night, I wanted to surprise my husband with a really fun drink.  Usually, he's the one who likes to experiment with different blender drinks, like pina coladas, etc, and, let's just say, I'm not a great bartender.  (My specialty is opening a bottle of wine.  Ta-da!!)  So, I thought part of the surprise would be that I would make a really fantastic drink that he'd love.  He already loves mojitos and it had been a long time since we made those, so I did a bit of research.  I looked through four or five raspberry mojito recipes, tried a couple and ended up combining them.  This is what I ended up with:

Take a bowl or something with a flat surface (I used a large coffee mug) and mash together two leaves of mint (NOT chopped up or torn into small pieces), six or seven fresh red raspberries, about 1 tsp. of lime juice and about 1/2 tsp. of sugar.  Once they are all mashed together, pour the mixture into your drinking glass.  Add ice (I used cubed ice but my husband usually uses crushed).  Over the ice, add two ounces white rum and about four ounces of tonic water (I used diet tonic water).  Stir a bit with a straw and you've got yourself one yummy summer drink.

Here's a not-very-fancy picture of what the end product looks like, cheap grocery store straw and all!


Tips:

*I only put about three ice cubes in each drink because I didn't want it to water-down while I was drinking it.  It might sound like a strong drink because it has just over a shot of rum in it, but honestly, the sweetness of the sugar and the flavor of the mint make you not notice the rum one bit.

*I'm kind of weird because I really love crushed up raspberries.  If you drink this through a straw, the raspberry seeds are going to be the first thing you suck up.  SO, if you don't want that, I would strain the "mashed up mixture" before you pour it into your drinking glass and just add a few whole raspberries for looks at the end.

*During the first attempt at making this drink, I tore up the mint before I mashed it.  The flavor was outstanding but when I drank through my straw later, I not only got the raspberry seeds but also chunks of leaves.  By keeping the mint in it's whole-leaf form, you still get lots of mint flavor, without having to eat the mint leaves later.  Just my opinion.

This all probably sounds a little novice to you drink-mixers out there, but as I warned you, I'm no bartender!!  :)

Tuesday, May 8, 2012

Pizza

My family loves pizza and we're no strangers to the pizza delivery places.  However, lately, we've been finding it much more fun to make our own.  Part of this was prompted by my MOMS Club, which used to have a monthly "take 'n' bake pizza" activity.  No one had hosted one for about a year, so I thought it would be fun to put it back on the calendar.  After taking some advice from my friends who are seasoned in the "make your own pizza" department, we got the hang of it.  Why did it get so easy all of a sudden, you ask?  I realized that I don't have to make the dough myself, which is what I was previously dreading.  You could get one of those pre-cooked crusts at your grocery store or get the roll-out dough from the can in your dairy section.  Here are two options that I like better:

1. Trader Joe's sells balls of dough (by the cheese/deli meat area, usually) and it's super cost-effective.  At my local store, it only costs just over $1 per ball of dough, which is pretty darn cheap for a pizza, if you ask me.  If you're going this route, I also suggest you invest in a dough-roller.  I like the Pampered Chef one and it works so well.  You can also just use your hands, but be sure to use a significant amount of flour and also know that it's going to take you a bit of time to get it right.

2. Schwan's now sells empty dough crusts already spread out on a bake-able pan.  Talk about easy!  If you don't want the mess of rolling your own dough but you want to make your own pizza, I highly suggest getting some of these.  There are two to a package and they end up being so tasty.

Here's the "before cheese" picture of our pizza the other night (with a Schwan's crust):


Everyone's got their favorites.  My kids wanted just alfredo with cheese (hence, the plain-looking side of this pizza) but my husband and I were in the mood for spinach, artichoke, chicken and some bacon bits.  Seriously, delicious.

Also, to make it even easier, go to your local grocery store and get a disposable pizza pan to roll your dough in.  It makes the whole process less messy, plus it's a quick clean-up after dinner's over.  I get my pans for $2.99 for a pack of three....and you can't really go wrong with that either.  Enjoy!!

Monday, May 7, 2012

Whole Chicken in the Crock Pot

The other week, I bought a whole Gold 'n' Plump chicken (think rotisserie-sized) for 99 cents.  I was pretty proud of myself because it involved doubling a coupon as well as taking advantage of a sale, and I threw it in our chest freezer for a rainy day.  This weekend was pretty rainy....so it got me thinking about how I was going to cook that darn chicken.  I decided that it would be oh so handy if I could just throw it in the crock pot and ta-da!!  But, come on---how is THAT going to work??  Well, let's just say, it worked wonderfully, thank you very much.

I googled a basic crock pot recipe and came up with this unique technique.  You're gonna think this is kinda cool so stick with me here.  :)

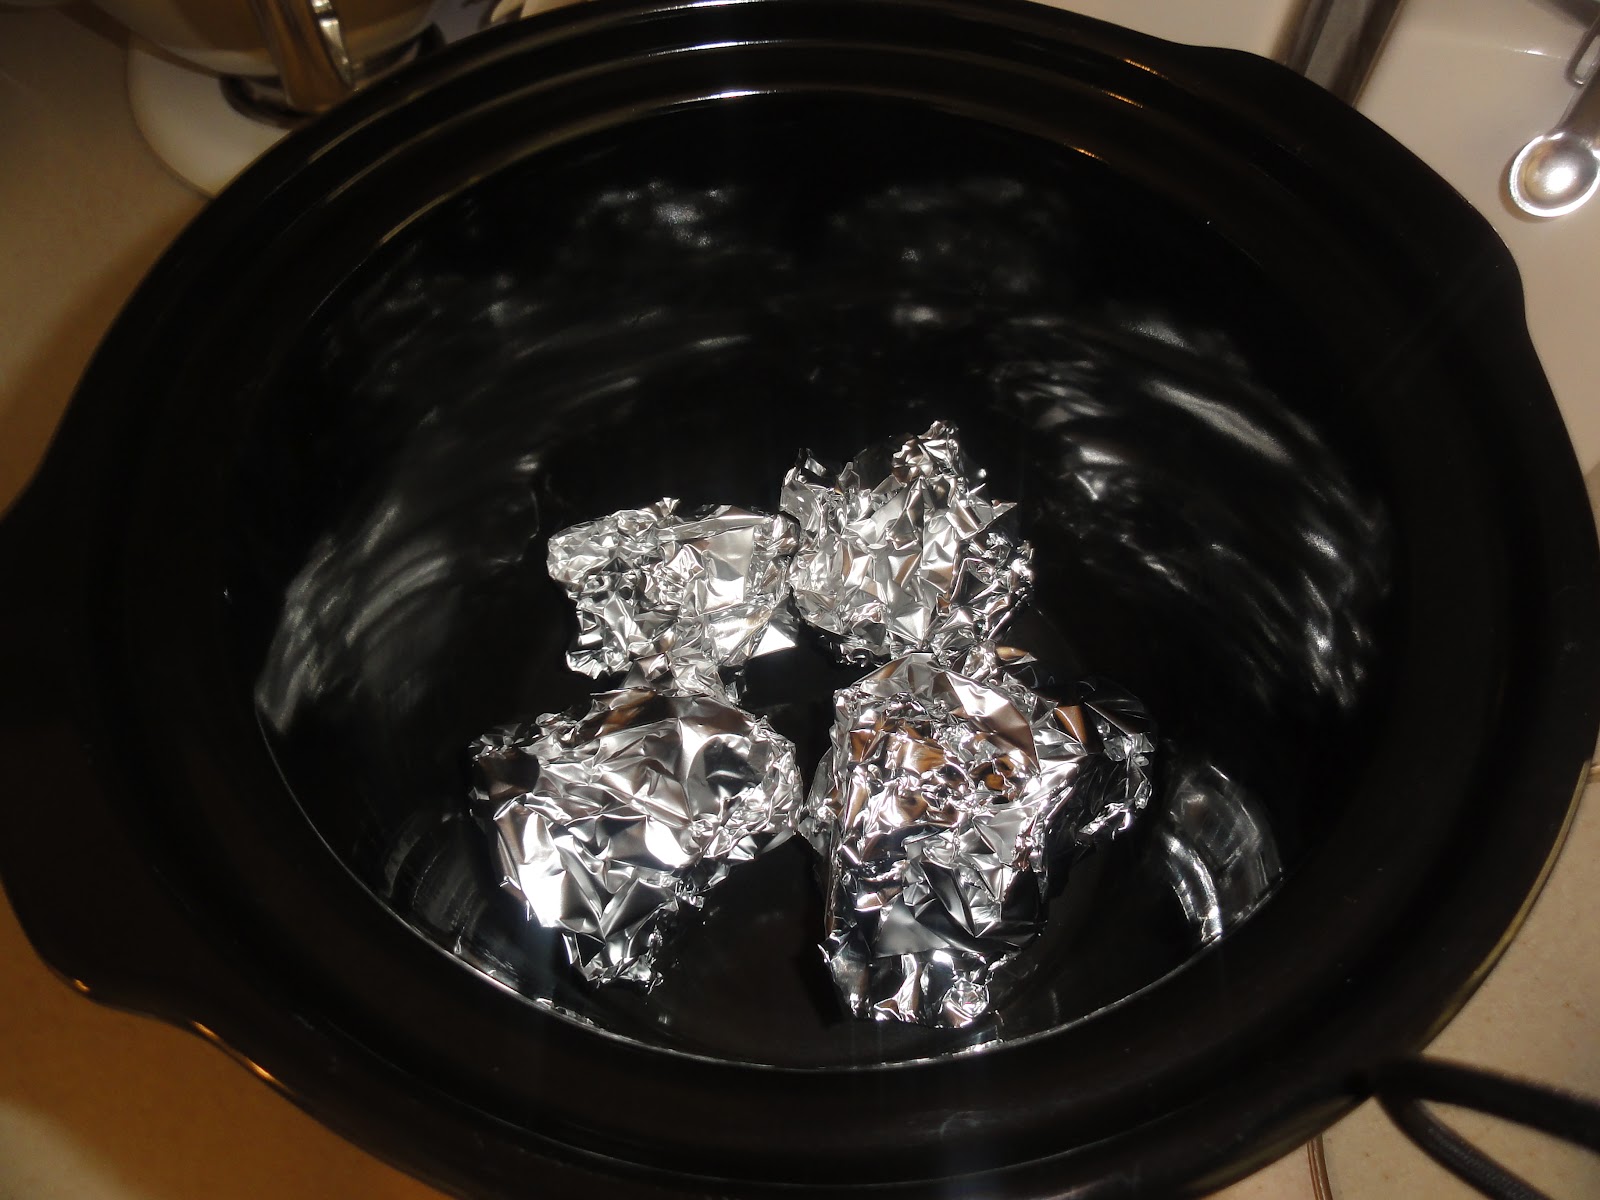
First, I took my crock pot and waded up a few balls of tin foil.  I put the tin foil on the bottom of the crock pot, like this:


At first I was like "This is kind of kooky..." but it all makes sense to me now that I've tried it.  One smart lady commented on the recipe that sometimes she wraps potatoes in the foil and cooks them with the chicken.  Who woulda thunk it, right?  Okay, let's carry on, shall we?

Next, I washed the chicken in cool water, sprayed it generously with olive oil cooking spray and sprinkled the entire thing (inside and out) with seasoning salt.  (I used regular old Lawry's.)  Also, note here that I left the skin on.  The recipe didn't say anything about taking it off and I think it helped moisten the chicken as it cooked.  Then, I put the chicken in the crock pot on top of the foil balls---back-side down.  (Not sure why that is important but, hey, I'm following directions here.) 


I was using my medium-sized 4-quart crock and it fit like a glove.  The recipe said to cook it on HIGH for 4-6 hours.  After four hours, I checked the temperature of it and it was done.  Thirty minutes later when I decided it was supper time, it was falling apart when my husband tried to take it out.  Perfect, if you ask me!  It wasn't dry, and it was just right.  Some of the skin was cooked like you'd see on a rotisserie chicken and some wasn't.  My husband commented that you could really do anything you want to this recipe and add whatever flavors you like.  He even wants me to try it just the same but with pouring a beer in the bottom of the crock so it kind of has a "beer-can chicken" flavor to it.  Definitely one to experiment with and I'll certainly be cooking this more often.  Also, keep in mind that the chicken was so good that it would also be perfect for pulled chicken sandwiches or using the chicken for a buffalo dip or a salad.  Really, the possibilities are endless and knowing how cost-effective this meal is, it's sure to be a hit with your family and your wallet.  :)

Friday, May 4, 2012

Taco Salad

In honor of Cinco de Mayo, tomorrow I'm going to whip up a quick taco salad that is really healthy.  I know, healthy isn't the most appetizing adjective to use for a dinner but during the weekends, we're always on the go, so a light, filling meal that we can eat quickly is always good for us.  When I used to think of a taco salad, I would think of that delicious deep-fried taco-chip bowl that restaurants serve, not to mention lots of sour cream and other sauces that I mix around and saturate the salad with.  Don't get me wrong, I LOVE those kinds of taco salads.  However, my husband would be asking to lay off the sauce on his salad so I had to come up with a better solution.  This idea came partly from a friend years ago and I also added some of my own favorites in there, too.

Chopped Lettuce (regular ice berg or romaine works the best)
1 lb. ground beef, browned and drained (again, you can use ground chicken for this, too)
diced tomato
diced avacado
sliced black olives

Toss it all together in a big bowl with Italian dressing.  ***Don't saturate it!!***  Just start with a couple of drizzles and go from there.  You don't want too much of the Italian flavor but you want to get the salad to blend together a bit.

Now, I like to eat it just the way it is, with a little cheese sprinkled on top, some spicy salsa and a little dollop of 0% fat Greek yogurt (because I'm crazy like that).  My hubby likes to crush up tortilla chips over his and add spicy salsa and taco sauce.  This is like the fajitas, and the taco soup---everyone has their own favorites when it comes to toppings on a taco.  Go wild with it!

One last thing: you'll notice that there's something missing from the ingredient list, and that's taco seasoning.  If I were making actual tacos, I'm sure I'd throw in some seasoning while browning the meat.  With this salad, it's so much lighter without it and the Italian dressing proves to be enough.  This makes a great summer meal so enjoy!

Thursday, May 3, 2012

Finally...A New Web Address

If you're reading this, then you got the memo about the new web address.  I finally found one that works!  Notice that the title of the blog is still "What's For Dinner?"...because that's the question on everyone's minds.  :)

Thanks for reading! 

Green Beans

The green beans that I made last night were VERY well-received by my family.  In fact, my 6-year old gave them an "A+++" grade and told me to make them "every night".  Okay, that might be a bit of an exaggeration on his part, but they were pretty darn delicious.

Here's the recipe, which I found in Taste of Home magazine a couple years ago.  (Recipe submitted by Lori Daniels of Beverly, WV.)

1 lb fresh green beans, trimmed and steamed until crisp tender

In a saucepan, mix:
1/4 C butter
1 T olive oil
1/2 tsp salt
1/2 tsp Italian seasoning
1/2 tsp lemon juice
1/4 tsp grated lemon peel

Mix until the butter is melted and toss with the steamed green beans.

You might be thinking, "I have all of these ingredients except for a lemon so I can skip the lemon peel part."  Don't you dare!  I am all about take the short-cut when it comes to...well, anything...but the lemon peel really adds something to this dish.  I even added more the 1/4 tsp.  It tasted great AND it was pretty.  If you don't have a zester from Pampered Chef yet, I suggest investing because it makes zesting citrus SO easy.  So, go ahead and buy that lemon because it will be worth it when you get compliments on the green beans later.  :)

Wednesday, May 2, 2012

Salmon, Green Beans, Squash...

Today, I'm not whipping up a big dinner with canned goods from my pantry.  I did find a lovely salmon fillet in my freezer last night so we'll be having that with potlatch seasoning on it, which is a favorite of ours.  I am also going to try a new green bean recipe and I'll make some mashed butternut squash with a little bit of cream, cinnamon and butter (the Land O'Lakes Cinnamon Butter works fabulous for this).  I'll be sure to post about the green beans once we try them.  I cleaned out my fridge yesterday and realized that we were out of all the yummy produce that we usually eat, so today was "stock up" day for the week.  Three stores later, we're re-charged with our fruits, veggies and dairy....not to mention some cookies and Lucky Charms that a certain four-year old talked me into.  I did get a few meat items that were on sale but I kept having to remind myself NOT to get more of the stuff that I already have (aka canned and non-perishables).  I doubt my freezer will be empty after this because I can't pass up a deal on the meat we eat all the time, however, I do think this will help me be more organized for awhile.  Thank you to my friends who ate up a whole boxful of corn dogs the other day (one item out of the freezer for now!) and thank you to my children who each ate TWO sherbet push-ups yesterday.  :)

Tuesday, May 1, 2012

Taco Soup

I received a recipe for this kind of soup years ago at a Pampered Chef party and have since kind of made it my own. Not sure if I'm still going by the original recipe since I often just throw stuff together. I know we had fajitas yesterday so maybe having another taco dish is redundant to some people. Luckily, my family isn't picky when it comes to repeats! :)

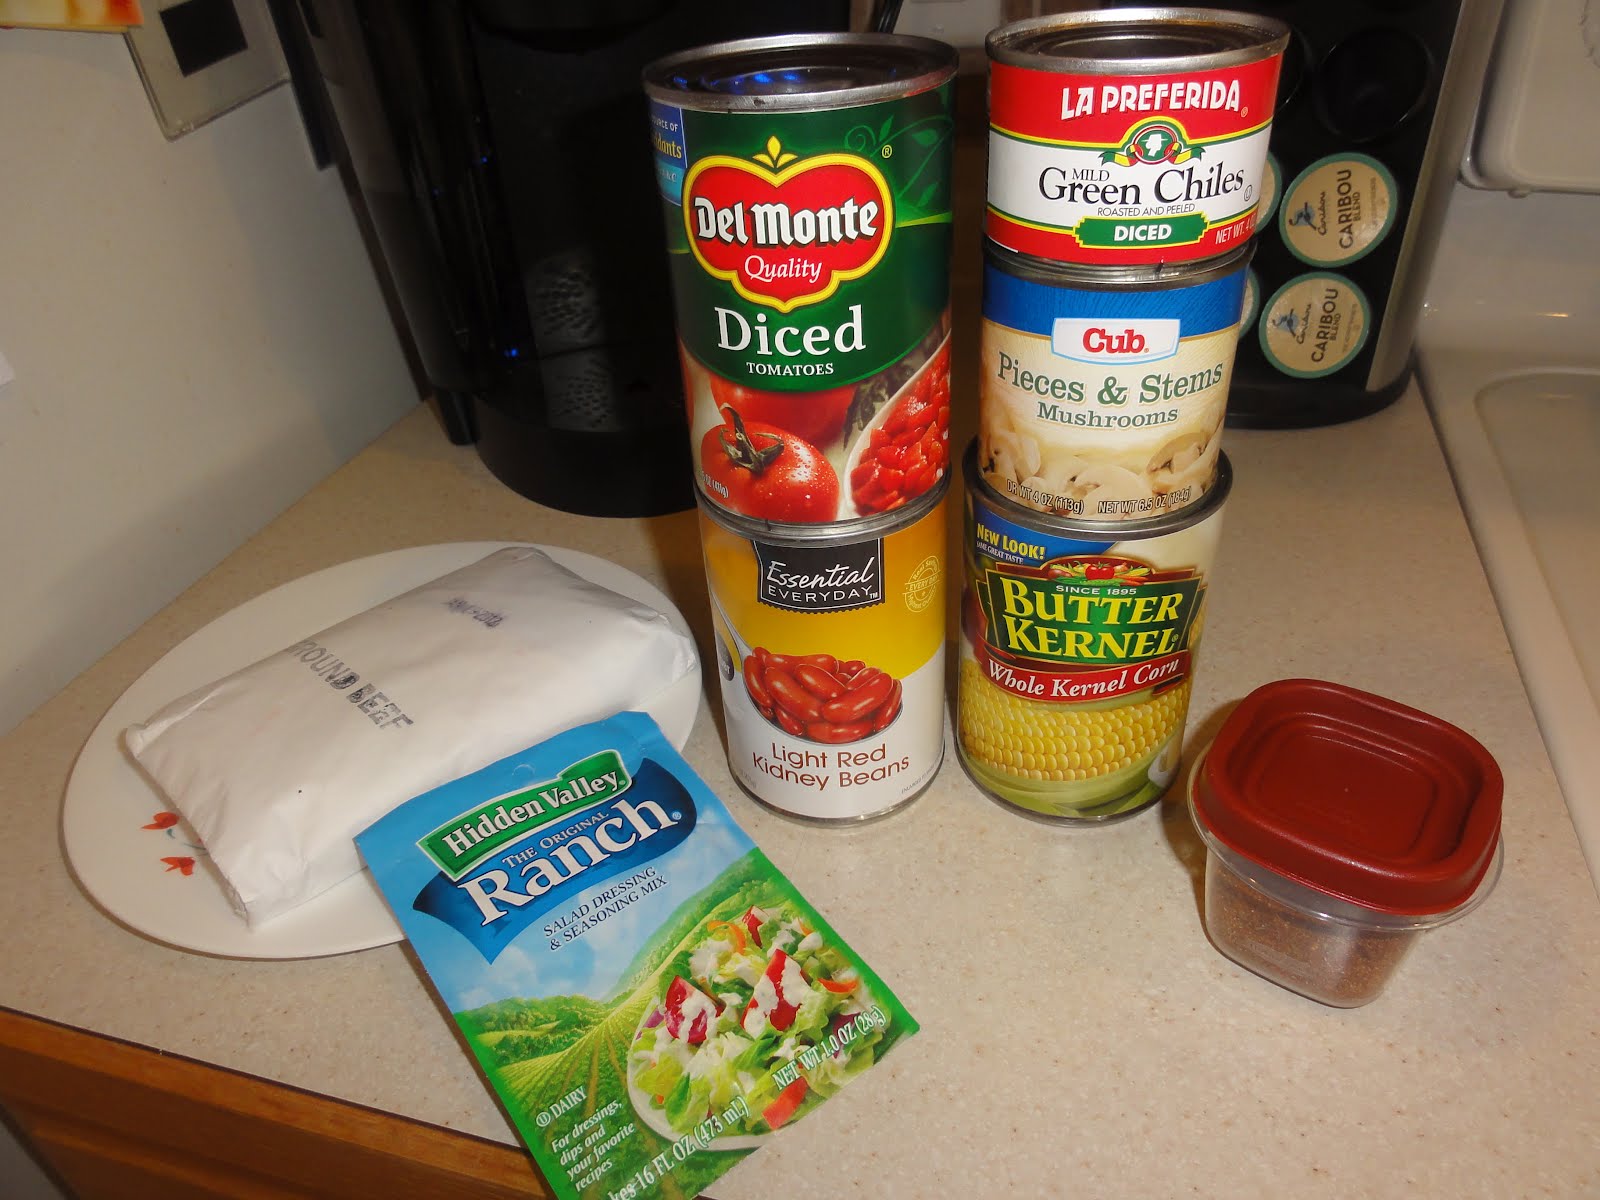
I poked around my pantry and I had all of the following:
Looks like a good soup to me! Now, I have to let you in on a little secret. This soup isn't just awesome because of the taste. It's awesome because it's a "dump and go" soup. You don't even drain the cans before you dump the contents into the pot. You basically open the can, dump in the entire contents and voila! You've got soup! Oh, you want more detailed instructions? Well, here you go:

Brown and drain one pound of ground beef (also works with ground chicken).

Add one can of diced tomatoes, one can of corn, one small can of green chilies, one small can of mushrooms (optional), and one can of light kidney beans (can also add any other kind of bean you have on hand---pinto, black beans, etc.), one packet of dry ranch mix and taco seasoning (of course I am still using my home-made seasoning for this one).

A few tips:
*If you don't want to let it sit all day in a crock pot, I would suggest browning the beef in a dutch oven and letting all the ingredients simmer for about 30 minutes before you eat it. It's so much better when all the flavors can meld together for a bit. If you are lazy like me, you might want to make your dinner in the morning, but eat it at dinner time. So, I brown the beef and then add everything to my crock pot. Again, voila, you've got yourself one easy meal!

*You can use a packet of taco seasoning for this one, but I would start by adding just half of the packet (or 1/2 T. of the homemade stuff). If you like your soup spicy, then go ahead and add more. (I usually add about 1 T., but what can I say? Some like it hot.)

 *Pile on the toppings! This is like a taco in a bowl, so go ahead and add some sour cream, shredded cheese and whatever else you like after you scoop it into serving bowls. Maybe it's just an excuse for me to eat sour cream, but boy, it sure is yummy! :)

Monday, April 30, 2012

Crock Pot Steak Fajitas

I posted another recipe on how to make Beef Fajitas awhile ago, but wanted to make a different recipe with things I already had in my kitchen this time. (I'm currently out of salsa, which is a key ingredient in the previous recipe.)

Here's what I had already:
1-1/2 lbs round steak (could also have used flank steak or skirt steak)
sliced bell peppers (I have two red, one yellow and one orange)
sliced onion (always a must-have staple in my kitchen)
1 can diced tomatoes (I used "diced tomatoes with zesty green chilies")
1 T taco seasoning (I used my home-made but you could also use a packet of seasoning from the grocery store)
about 1 T of cornstarch to thicken the sauce up

I mixed the tomatoes, taco seasoning and cornstarch and poured over the raw meat in the crock pot. Other recipes I have seen call for you to add the peppers and onion at this time, too, however, when I have cooked it this way in the past, the peppers are complete mush by dinnertime. Instead, I added them 2 to 3 hours before we planned to eat. Cook the meat all day on low (or on high for about 3-1/2 hours). It will just fall apart when you take it out of the crock pot so there won't be too much of a need to cut it into strips.

 I don't need to add a "grade" to this one because it's a pretty basic meal. It's a hit with my family (my kids eat the meat by itself and not in a tortilla) and my husband and I load on all the fixings when we're making our own fajitas. Enjoy!! :)